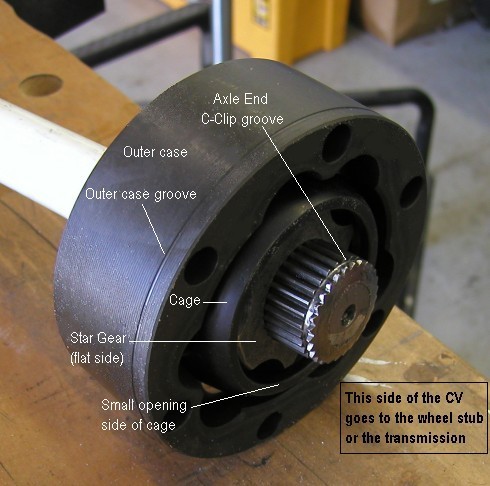
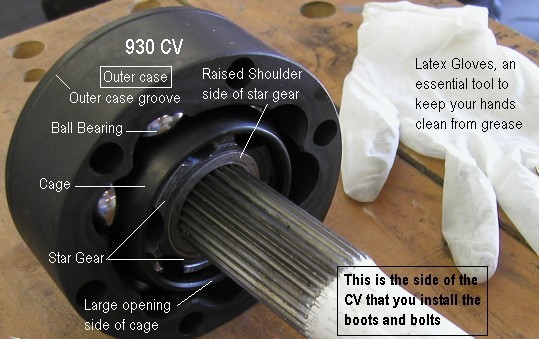
Here’s how your CV should look on the axle (less grease).
With the axle removed, pack the grease with a grease needle attachment for your grease-gun.
To clean up an existing CV it’s nice to have a solvent tank. But if you don’t have one of those, use a roll of paper towel and be patient, go slow, and read all of these tips below BEFORE you start the job.

Make sure the CV will slip onto your axle splines easily. DO NOT use a hammer to tap it on. If the CV doesn’t slip over the spline easy, look at the axle end with a magnifying glass to check for spline damage. Sometimes the splines can be mushroomed on the end. If they are damaged, sometimes a fine file with a 90 degree edge can clean up any damage to the end.
Hint: This picture shows an axle with a flat end, which is old school. The new style axles have a dome on the end to prevent the mushrooming of the splines. If you’re buying new axles, insist on the dome type, they work better. This axle shows signs of mushrooming, which requires tedious filing of each of the splines with a triangle file. It’s not fun, but it needs to be done. As the axle ages the filing job becomes easier each time you service the CVs because there’s less metal to file. It eventually turns into a quasi domed axle….kinda sorta.

A key trick to assembling your CV is to insure the orientation of the inner star gear and the outer case is correctly aligned. It’s not difficult if you know the secret.
When you start installing the ball bearings you simply have to line up the WIDE walls of the inner “star gear” with the NARROW walls of the “outer case”, and vice versa, as shown with read lines in this picture. If you do this right the CV will swivel around like it needs to for long travel suspensions. If you do it wrong the CV will have almost NO MOVEMENT to pivot freely. You’ll immediately know something is wrong because you’ll struggle bolting up the CV’s to the trans flange and hub assemblies. There’s a 50% chance you can do this wrong if you’re not aware of this assembly trick.

